Items used:
- A4 Basic Grey Cardstock
- A4 Smokey Slate cardstock
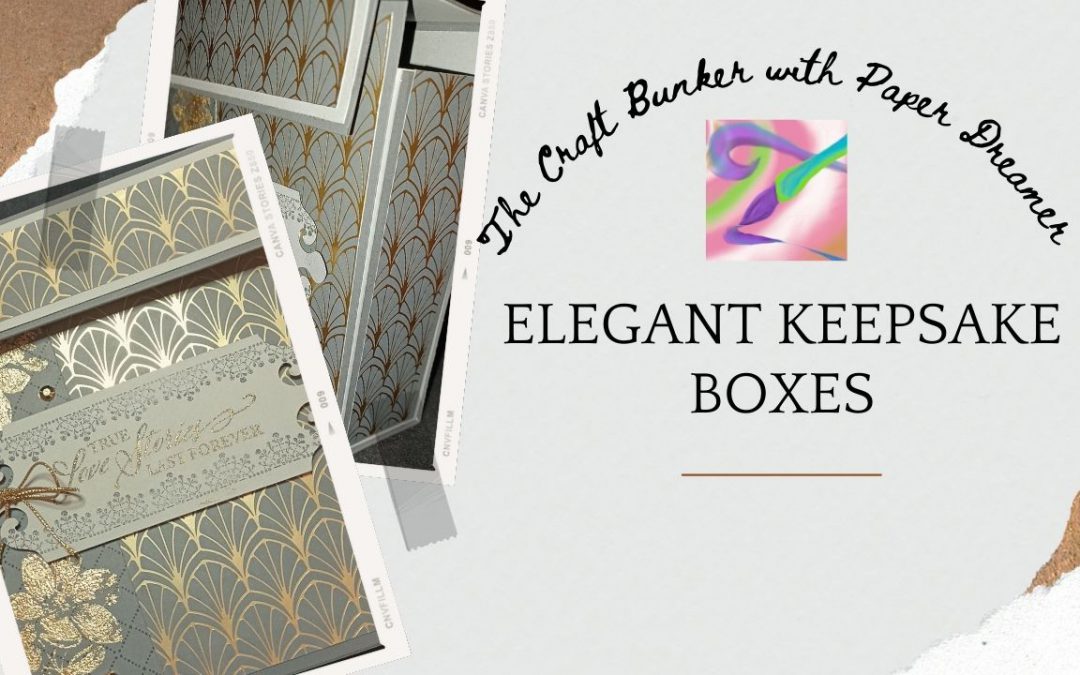
- Simply Elegant DSP from Stampin Up
- Trimmer and scoreboard
- Elegant tag punch
- Magnetic catches/Velcro dots (you will also need a hammer and a solid surface if using magnetic catches).
- Elegant trim (gold)
- Glue
- Gold leaf
- Heat and Stick powder
- Heat tool.
Stamps and Inks
- Elegantly Said Stamp set from SU
- Basic Grey From Stampin up
Measurements
Outer
- 1 sheet A4 Basic Grey cardstock cut to 6″ wide and scored at 6″ and 8″ The larger square will be the front.
- 1 sheet A4 Basic Grey cardstock cut to 6″ x 8 1/4″ and scored at 1 1/2″, 3″, 5 1/4″. Mark 2 points at 7 1/2″ on the inside. This will be the joining line.
- 2 @ 1 3/4″ x 5 3/4″ Smokey Slate cardstock (top)
- 1 @ 1 1/2″ x 5 1/2″ Dsp (top)
- 1 @ 1 1/4″ x 5 3/4″ Smokey Slate cardstock (front flap)
- 1 @ 1 1/8″ x 5 1/2″ DSP (front flap)
- 1 @ 5 3/4″ x 5 3/4″ Smokey Slate cardstock (back)
- 1@ 5 3/4″ x 5 3/4″ DSP (front)
- 2 @ 5 1/4″ x 1 3/4″ Basic Grey Cardstock (sides)
- 2 @ 5″ x 1 1/2″ DSP (sides)
Liner
- 2 @ 5 7/8″ x 5 7/8″ Smokey Slate
- 2 @ 2 7/8″ x 6 Smokey Slate scored at 1/2″ on 3 sides
- 1 @ 1 7/8″ x 5 7/8″ Smokey Slate
Instructions
Exterior.
- Take the 6″x 11 1/2″ cardstock and fix the 5 7/8″ x 5 7/8″ DSP to the front. use your bone folder or the side of a ruler to press the score lines.
- On the inside, mark a point 1/2′ in from the top edge and halfway along (3″). This is the guide point for attaching the magnetic fastening. Press the legs of the back of the clasp into the paper to mark where to cut and finish cutting the slits with a craft knife. Do not attempt to push it through the paper. This will not work and will bend the legs.
- Once the cuts have been made, push the legs of the clasp through the front of the box and use a hammer to bend them in on the inside.
- On the 6″ x 8 1/4″ piece of cardstock, press the score lines. In the first of the 1 1/2″ sections mark a point 1/2′ in from the top edge and halfway along (3″), This will be the point to fix the other side of the clasp. Once the clasp is fixed in place, fold in the flap and glue in place. This will hide the back of the clasp and help to stabilise the opening.
- Using the guide points on the shorter piece, join the front to the back of the box. Once joined, fix one piece of the 5 7/8″ x 5 7/8″ pieces of plain cardstock to the back. This will both hide the join on the outside and help to strengthen the box.
Decoration
- With the box open, fix the 5 3/4″ x 1 1/4″ cardstock to the front flap, and add the 5 1/2″ x 1″ DSP.
- Repeat step 1, on the top of the box with a piece of the 5 3/4″ x 2″ cardstock and the 5 1/2″ x 1 3/4″ DSP.
- Fix the other piece of 5 3/4″ x 2″ cardstock to the inside of the top flap. This step is entirely functional and will add extra strength. Any decoration here is entirely optional as it will be on the inside of the finished box.
- Leave the decoration on the front until after the sides and lining are attached.
Lining and sides.
- Fix the mats and DSP to the sides before constricting the lining. For this you will need the 2 pieces of 2 7/8″ x 6 cardstock scored at 1/2″ on 3 sides, the 5 1/4″ x 1 3/4″ contrasting cardstock and the 5″ x 1 1/2″ DSP. It is much easier to do this before the lining and sides are fixed.
- Fix the 1 7/8″ x 5 7/8″ cardstock to the inside of the bottom flaps on each side. The tabs won’t show once the lining is fixed inside, and fixing them on both sides will give the box more stability.
- Fix the 5 7/8″ x 5 7/8″ to the inside of the flaps on each side.
- Once you have your liner constructed, fix one 5 7/8″ x 5 7/8″ side of the liner to the inside of the back of the box so that the bottom of the liner is along the scoreline, and the sides line up with the exterior. Don’t worry about the small gap at the bottom of the liner. This gap will not be seen and will make it easier to fix that part of the liner to the bottom of the box.
- Fix the bottom of the liner to the bottom of the box. Use a ruler or bone folder to make sure it’s properly fixed. this is what the gap is for.
- Finally, fix the front of the box to the front of the liner. The area around the back of the clasp will need some extra attention to make sure the edge of the paper is properly stuck down.


Please follow and like us: